
How to Create a Manual Backup of your Website
In today's digital age, having a website backup is crucial to ensure that your valuable data and content are not lost in case of unforeseen events, such as website crashes or hacking attempts.
In this article, we will walk you through the step-by-step process of taking a manual backup of your website using cPanel file manager and importing the SQL database using phpMyAdmin. These are two commonly used tools in web hosting to create a backup for your website. Following the instructions, you can protect and restore your site's data quickly and easily.
Compressing files with the file manager
- To log in to your Bluehost account, go to the Bluehost website, click "Login" in the top right corner, and enter your username and password.

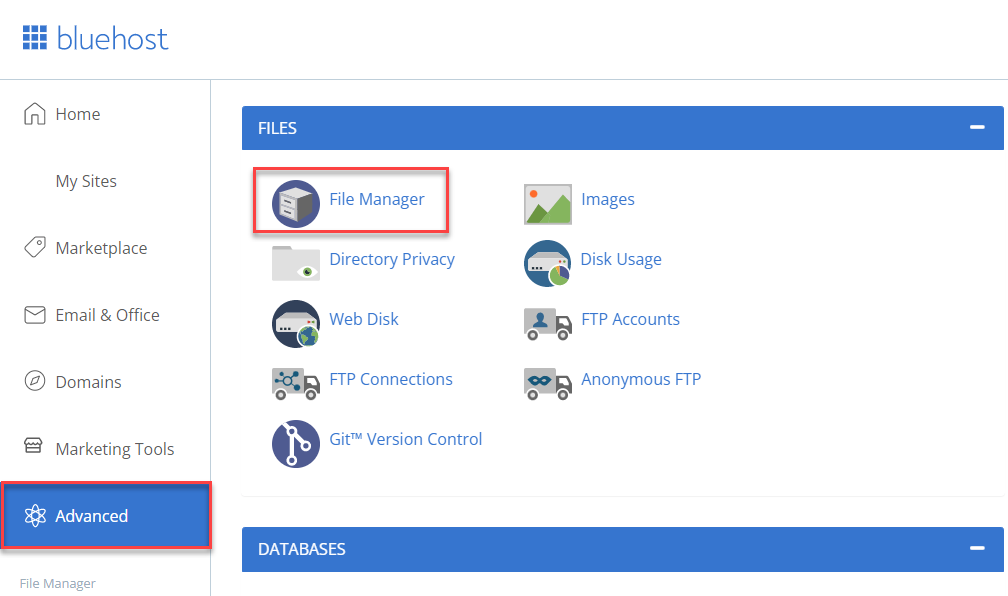
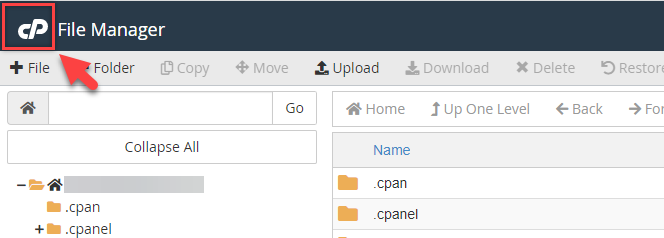
- Once you're logged in, click on Advanced and then locate the Files section. Next, select File Manager.
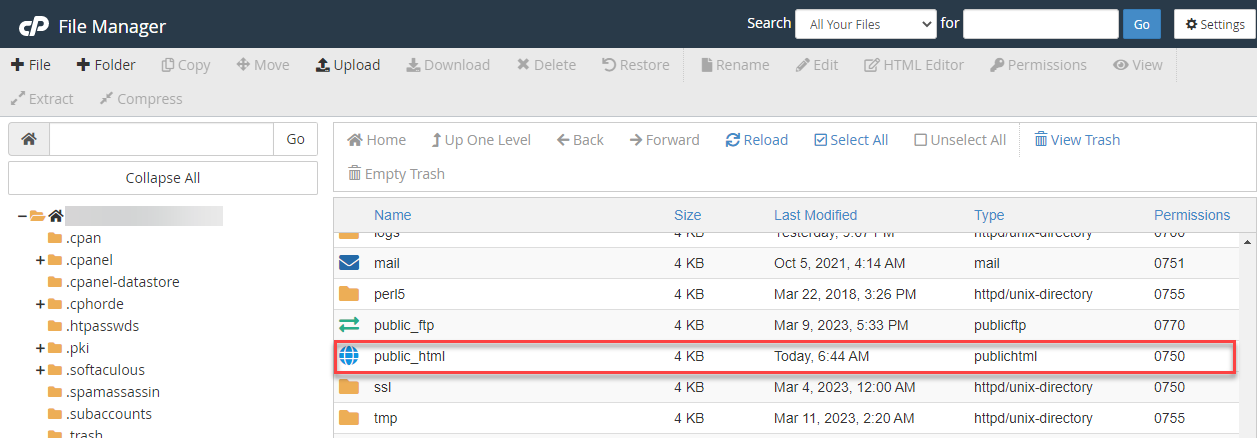
- Compress the files: If it's for your website's primary domain, double-click on the public_html folder to access its contents.
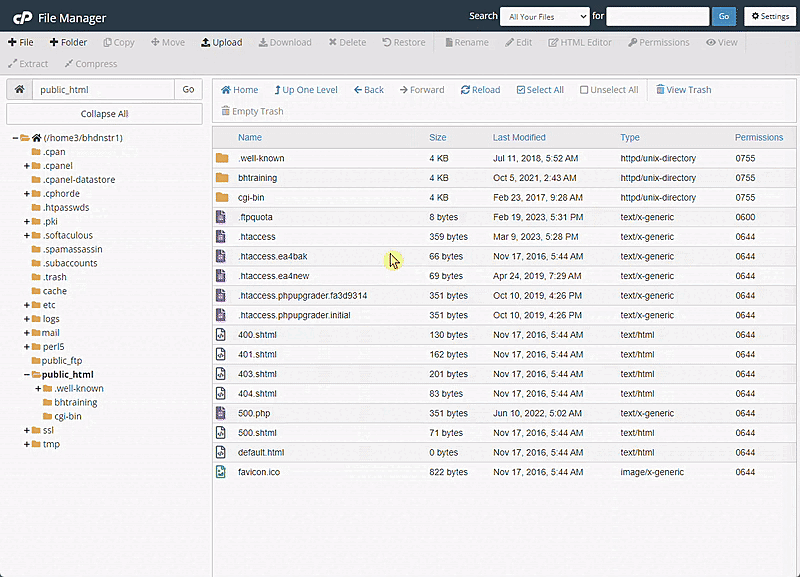
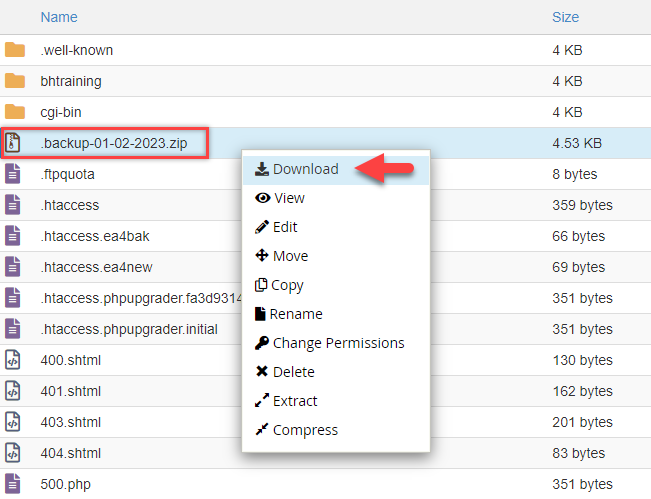
You can highlight all the files in the public_html folder by clicking "Select All," Once all the files are highlighted, click "Compress," This will create a .zip file containing all the website's files. Please ensure to name your backup with the date/time format, for example, "backup-mm-dd-yyyy," such as "backup-01-02-2023.
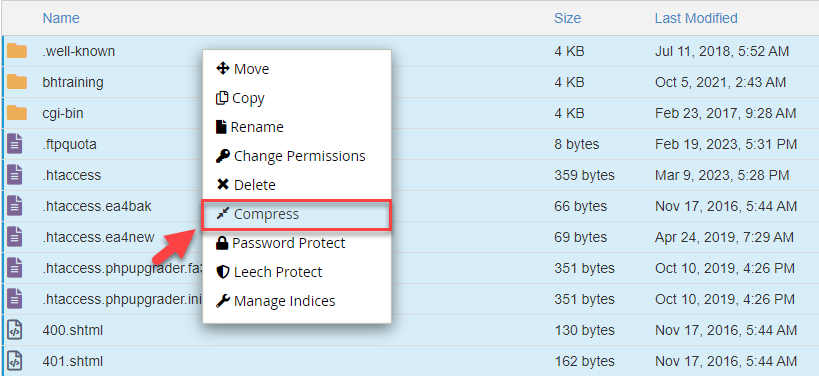
Tip: If it is an addon domain, you must first navigate to the subfolder, then highlight and compress all files. Another method for compressing files is to highlight them, right-click, and select compress.
- Once the .zip file is created, download it to your computer by right-clicking it and selecting Download. Alternatively, click on the Download button located in the top menu of the file manager after selecting the .zip file.
- Next, you will need to go back to cPanel. You can do this by clicking on the control panel logo in the top menu. This will take you back to the cPanel interface.
Exporting a database in phpMyAdmin
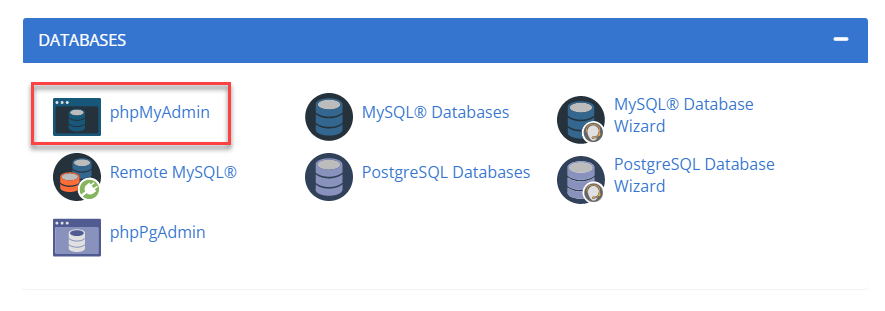
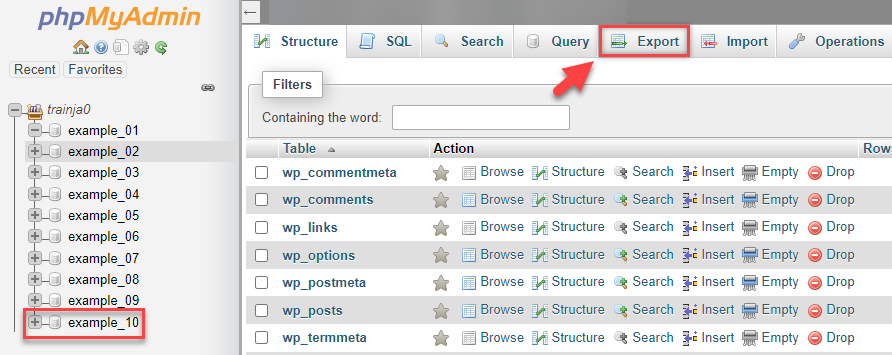
- When you're in the cPanel interface, scroll down to the Databases section. Next is to select the "phpMyAdmin" option, a database management tool for your website.
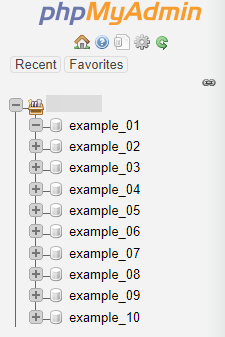
- After you launch phpMyAdmin, you'll see a list of databases linked to your Bluehost account. You can access the files on your website by clicking on the database.
Note: If you need clarification on that information, look in the public_html folder for the wp-config file; to learn more about how it works, see How to Find Your WordPress Database.
- To export your website's database, select the relevant database in phpMyAdmin and click on the "Export" tab.
This will open a window where you can choose the export method. Click the "Go" button to download the database to your computer.
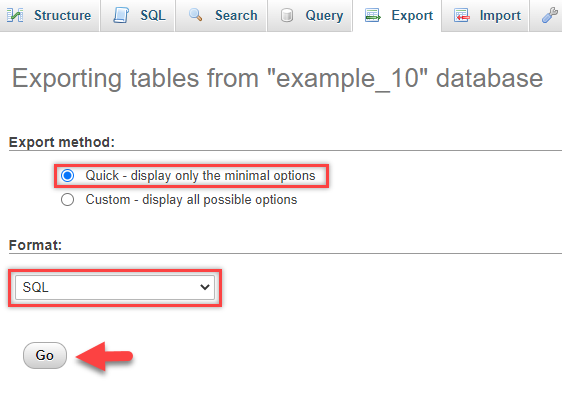
Note: Under the Export method, select Quick to back up the file instantly and Custom if you're very familiar with SQL tables.
- Create a folder on your computer and move the two downloaded files - the.zip file containing your website's files and the database export file - into that folder to keep the files organized for future reference. Rename the SQL file and include the backup date (MM/DD/YYYYY). This will make it easier to access the files if you need to restore your website.

If you need further assistance, feel free to contact us via Chat or Phone:
- Chat Support - While on our website, you should see a CHAT bubble in the bottom right-hand corner of the page. Click anywhere on the bubble to begin a chat session.
- Phone Support -
- US: 888-401-4678
- International: +1 801-765-9400
You may also refer to our Knowledge Base articles to help answer common questions and guide you through various setup, configuration, and troubleshooting steps.