
Website Builder (for WordPress) - How to Create and Manage Menus
This article applies to the Bluehost Website Builder (for WordPress). For information about using the Bluehost Builder (our express website editor not connected to WordPress), please see Bluehost Builder - How to Create and Manage Menus.
If you are not sure which version you are currently using, please see Bluehost Website Builder (for WordPress) vs Bluehost Builder for more information.
An organized menu helps your site visitors find what they’re looking for on your website. This article will walk you through how-to-do the following things:
- How-to add a menu
- How-to access your menu settings
- How-to add a page to the menu
- How-to edit menu items
- How-to change the menu order
- How-to create a submenu
- How-to delete items from the menu
To add a menu or make changes to your existing navigation, you will need to access the Bluehost Website Builder.
How-to Add a Menu
Bluehost Website Builder will automatically create a site menu based on the pages that have been added, so you won't need to add a menu - that has already been done for you. You can add, delete, edit, and reorder menu items by accessing your menu settings.
How-to Access Menu Settings
Select Menus & pages from the menu on the left. A list of your current pages will appear in the Primary menu.
Note: You can also access this menu from the top menu by selecting Page: Home from the top menu, then selecting Manage Pages from the drop-down menu.

From here, you can add, edit, reorder and delete menu items. You can also set how you would like page titles and descriptions to show up in search engine results. Read on for more details.
How-to Add a Page to the Menu
- Select Menus & pages from the menu on the left. A list of your current pages will appear in the Primary menu.
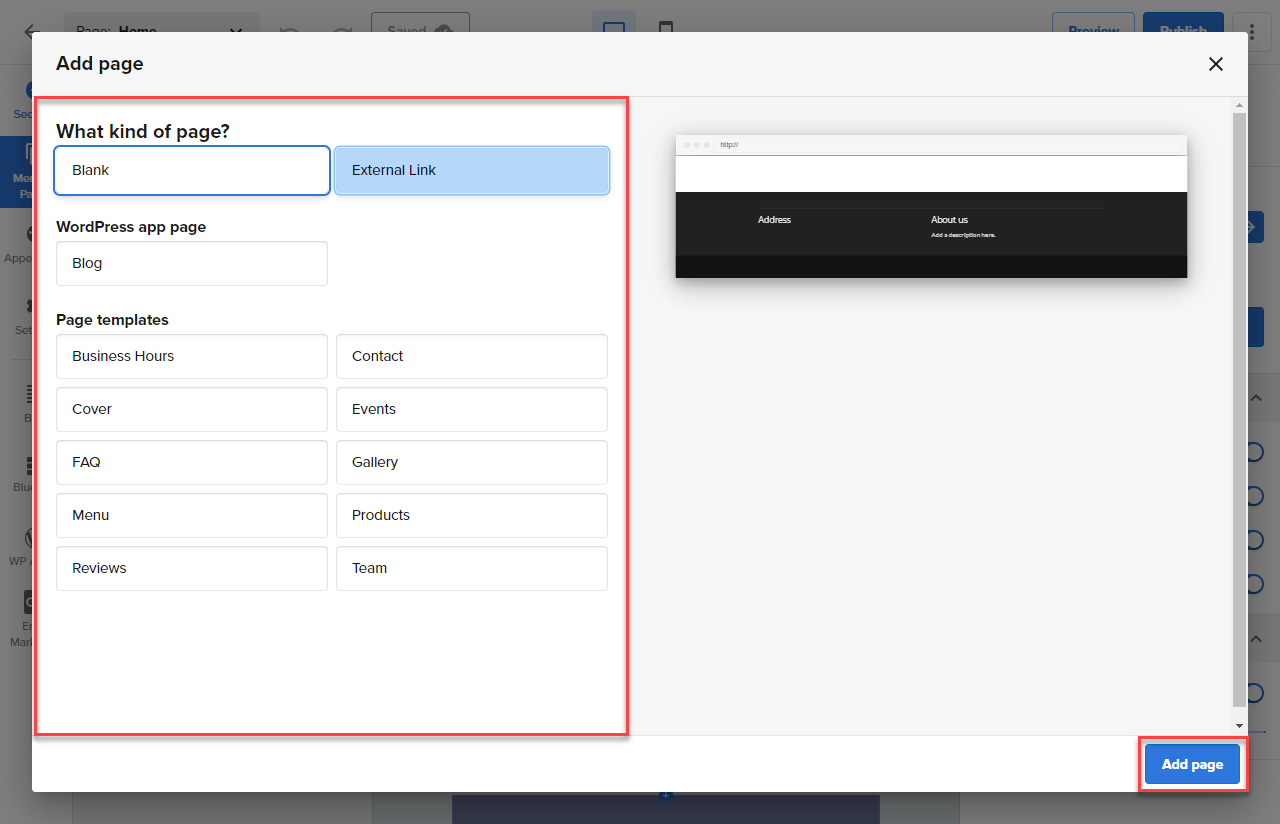
- Select New Page, and you’ll see options for adding a Page or an External link. Here is an example walkthrough below:
- Select either Blank (this adds a new page to the menu and your site), External link (this adds a menu item that links to a website outside of the site you’re working on), or Page Templates.
- For a Blank page, add your page name, and the Page URL will autofill based on the page name. You can change the URL by toggling the button labeled “URL" to match the page name.
- For an External Link, add the name you want to be displayed on the menu and enter the URL where you want to send visitors.
- For Page templates, this will allow you to select the most commonly used pages for a website, such as Business Hours, Cover image, FAQ, Menu, Reviews, etc.
- Click the Add page button when you finish, and your new page or link will appear in the menu.
How-to Edit Menu Items
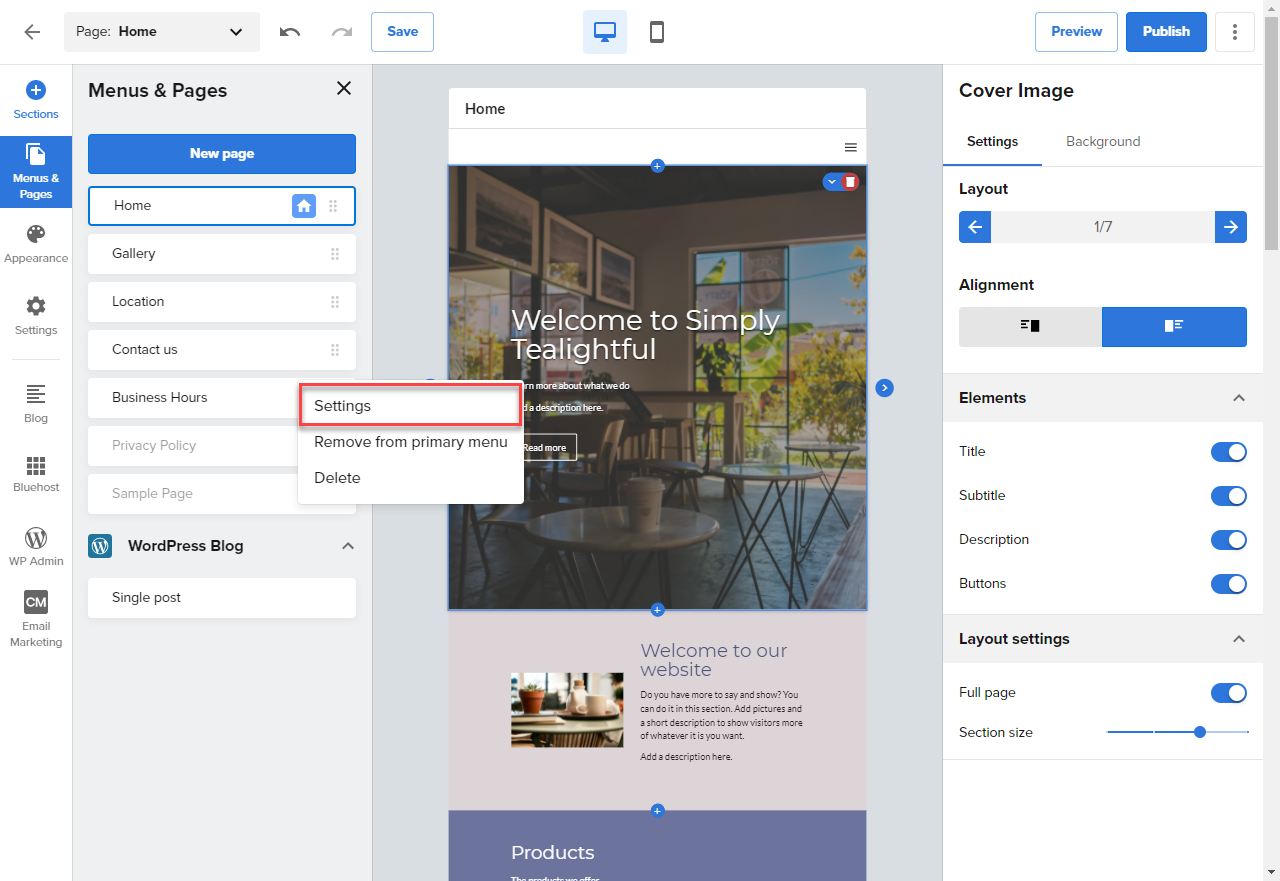
- Select Menus & pages from the menu to the left. A list of your current pages will appear in the Primary menu panel.
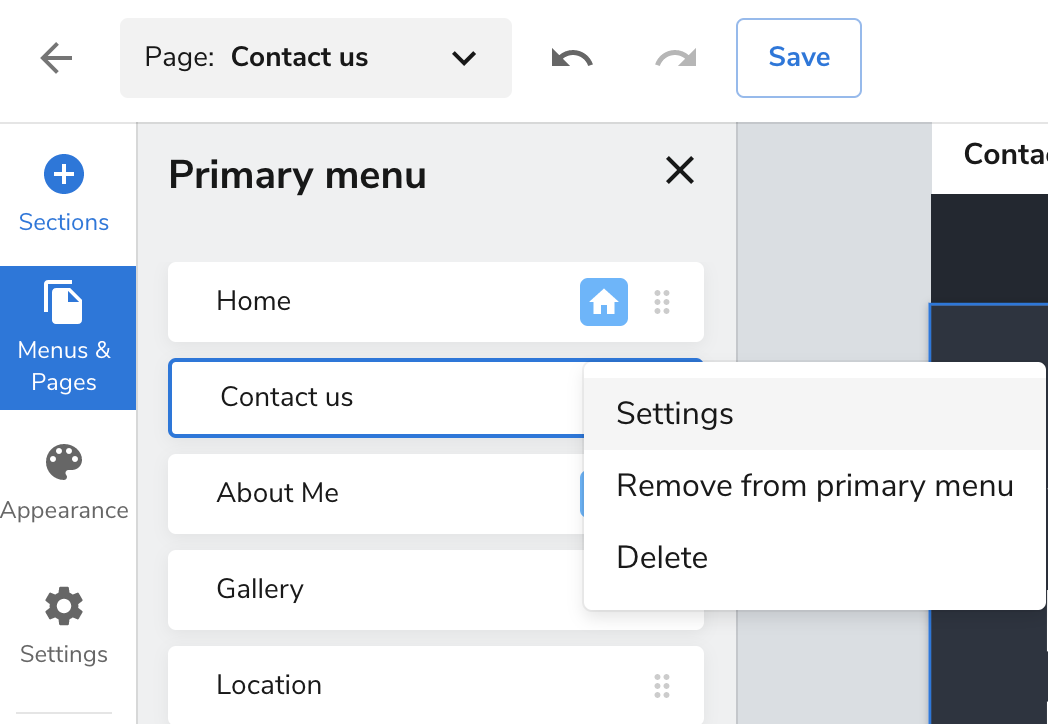
- Choose the page or link you want to edit and select the ⋮ icon.
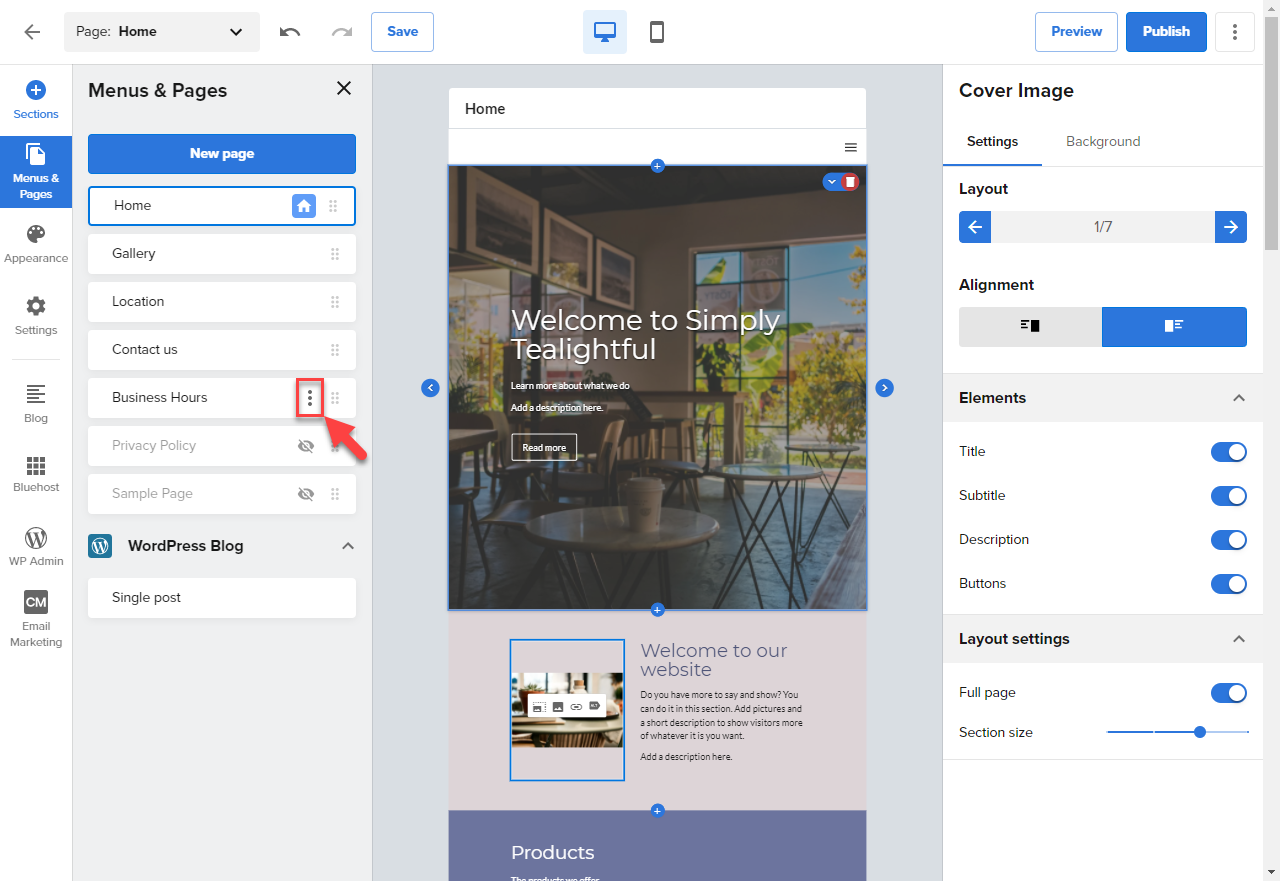
- Now, select Settings to edit.
From here, you can update the “Settings” and “SEO settings.” Keep reading for details.
Settings
- Select on the page you want to edit and click the kebab menu icon ⋮ , then select Settings.
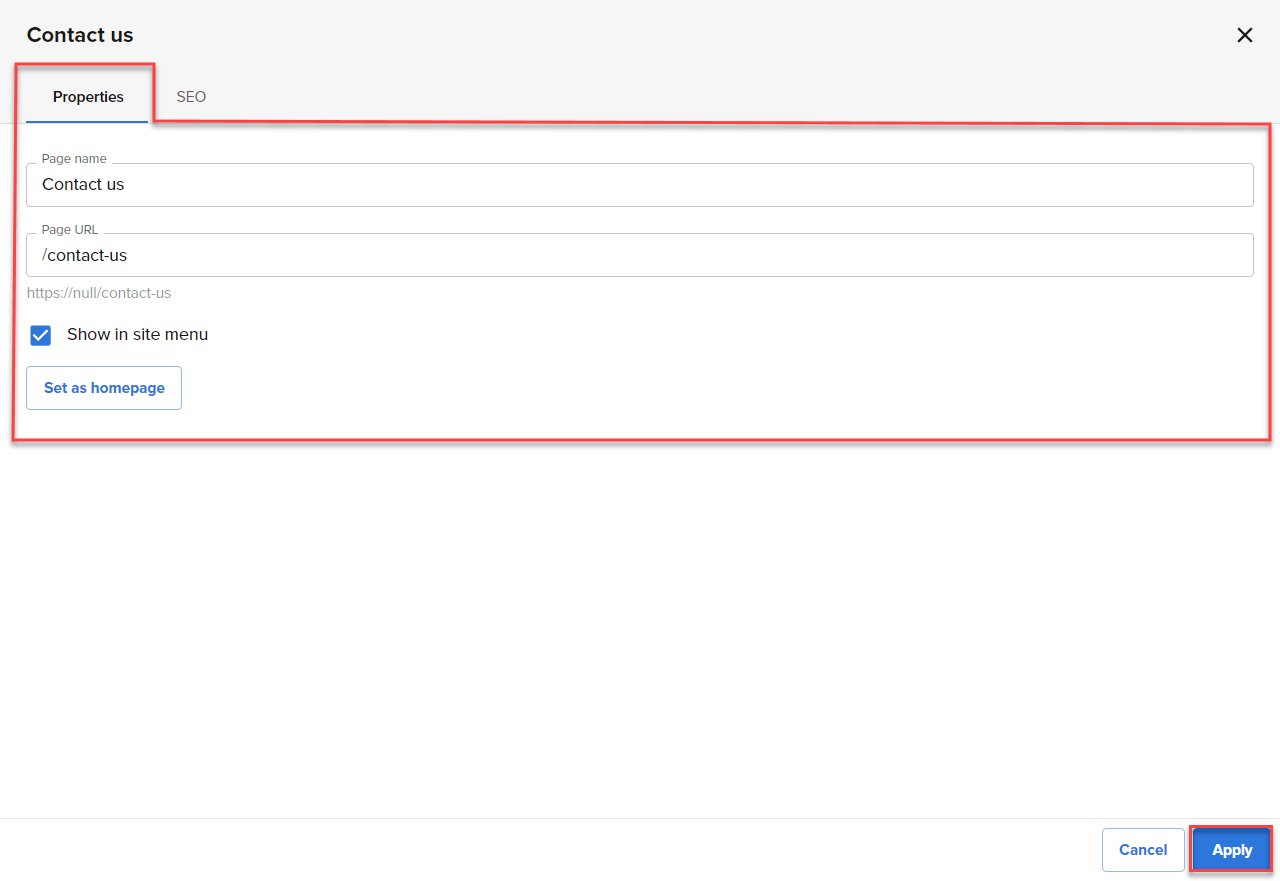
- Under the Properties tab, you can update the Page name, Page URL; also, you can toggle it on or off to show this page in Site Menu or Set as a homepage.
Note: the “Page name” determines how it will show up in your menu.
- Click Apply to save your changes.
SEO Settings
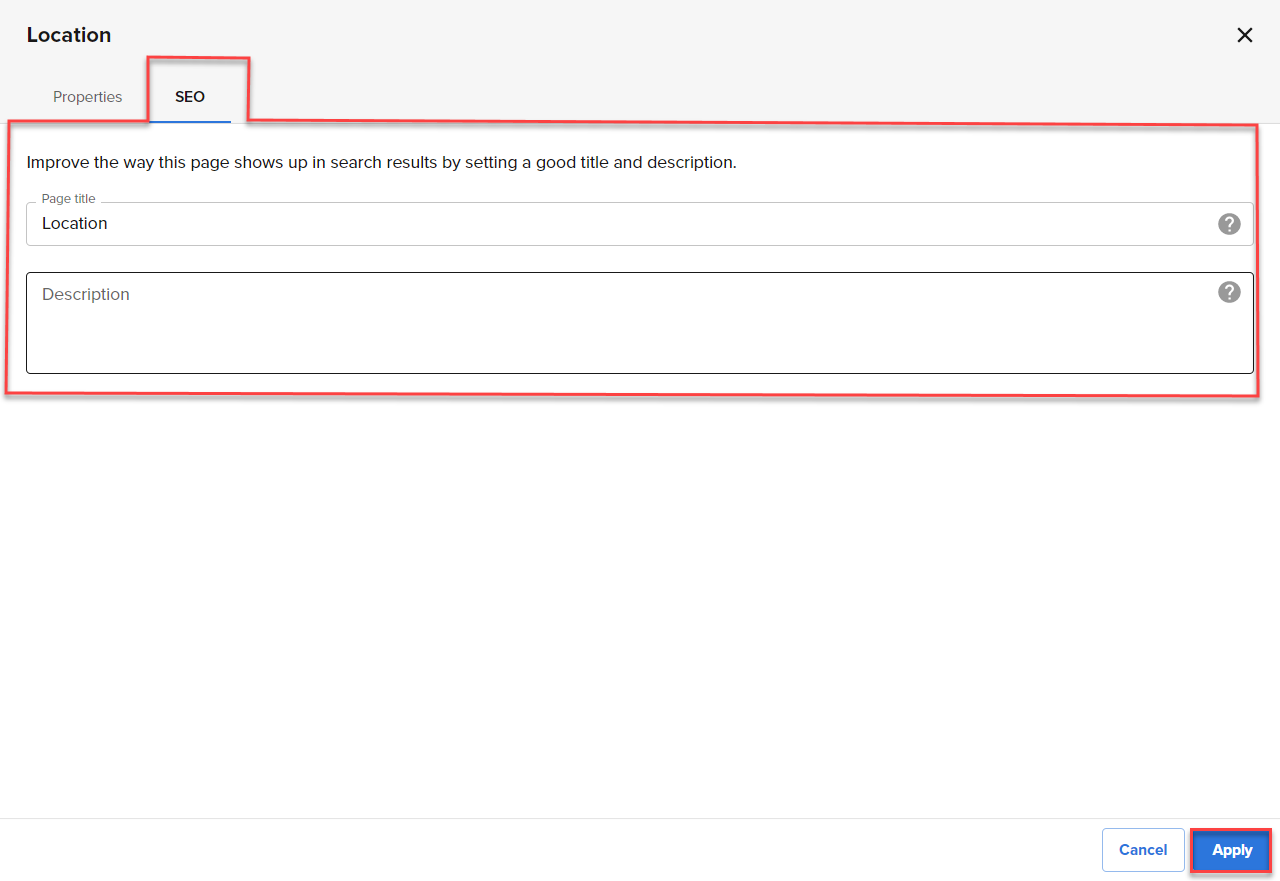
Your SEO settings determine how each page will show up in search results.
- Make updates to your Page Title or Description.
- Click Apply when finished.
Note: Changes to your SEO settings can take a while to update in search results.
How-to Change Menu Order
- Select Menus & pages from the menu on the left, and a list of your current pages will appear in the “Primary menu” panel.
- To re-order a menu item, select the ⋮⋮ icon.
- Drag and drop the item to change its place in the menu. Here is a quick walkthrough below:
How-to Create Sub-menu
- Select Menus & pages from the menu to the left. A list of your current pages will appear in the "Primary menu" panel.
- Select the page that you want to have a sub-menu by drag and drop underneath your preferred Parent Page.
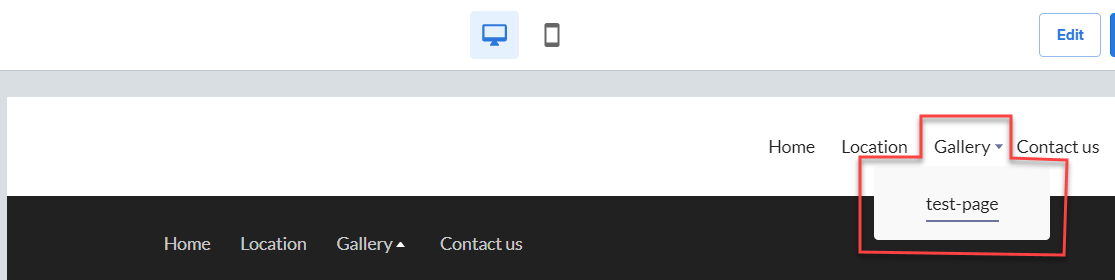
- Next, click the page and slightly drag it to the right. The v icon will show up underneath the Parent Page. It will automatically add as a sub-menu. Here is a quick walkthrough below:

Here is an example of how it looks like on the website:
How-to Delete Items from the Menu
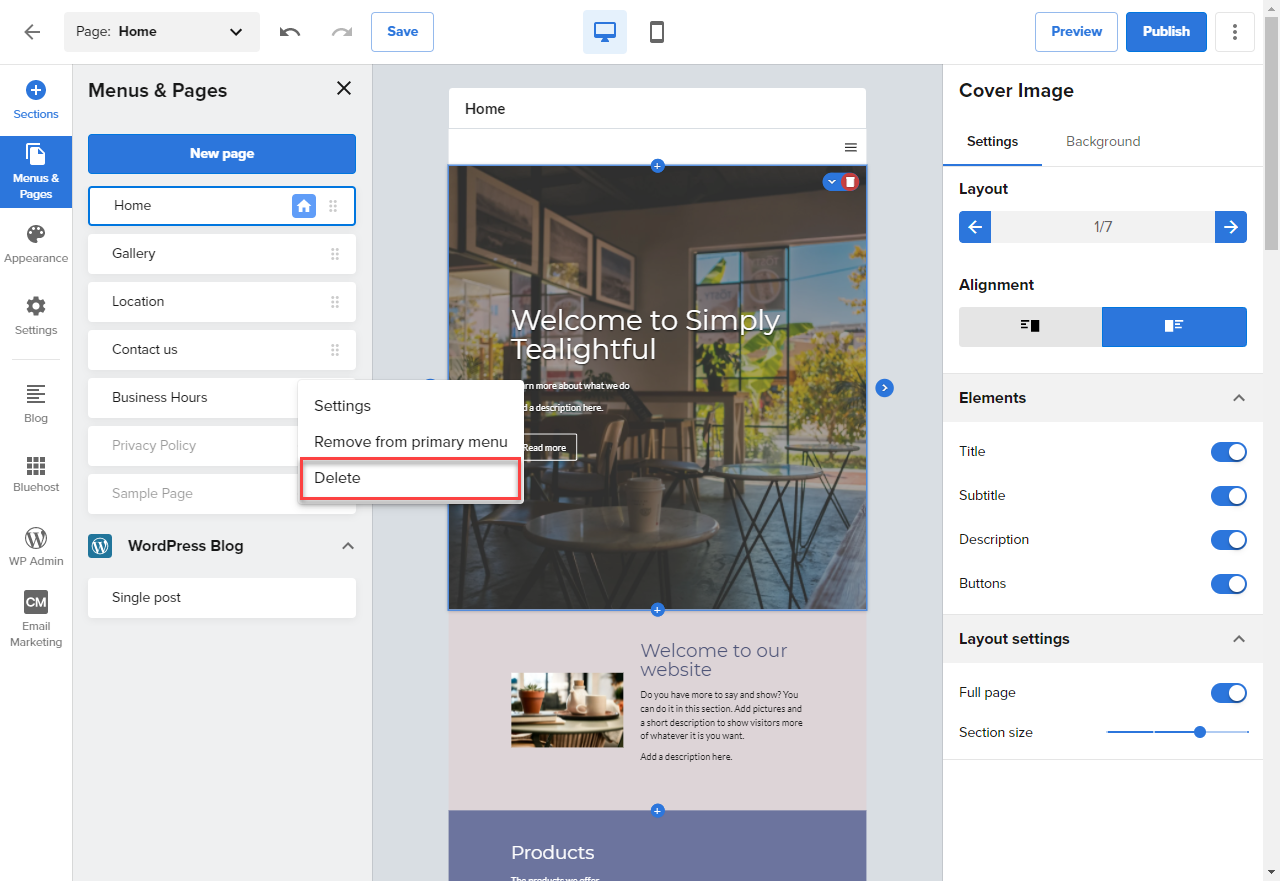
- Select Menus & pages from the menu on the left, and a list of your current pages will appear in the “Primary menu” panel.
- Choose the page or link you want to delete and select the ‘ellipsis’ ⋮ icon.
- Select Delete to remove the item permanently.
Please note: Pages cannot be restored once deleted.
If you need further assistance, feel free to contact us via Chat or Phone:
- Chat Support - While on our website, you should see a CHAT bubble in the bottom right-hand corner of the page. Click anywhere on the bubble to begin a chat session.
- Phone Support -
- US: 888-401-4678
- International: +1 801-765-9400
You may also refer to our Knowledge Base articles to help answer common questions and guide you through various setup, configuration, and troubleshooting steps.