
WordPress: Move Site to New Directory
Overview
This article explains how to move your WordPress website from one folder within your hosting account to another.
- What You Need
- Access the File Manager
- Copy Your Files
- Update The URL (Optional)
- How do I find the correct URL?
What You Need
Before you move your WordPress site, there are a few things you need to know:
- The username and password to your Bluehost account
- A basic understanding of what files and folders are
- The current location (folder and URL) of your WordPress site
- The destination (folder and URL) of your WordPress site
- The username and password to your WordPress site (optional)
Access the File Manager
The File Manager on your account can be used to move or copy files on your server. You'll use it to move your WordPress files. To begin, you will need to access the Bluehost Control Panel.
Note: Bluehost offers two account management interface options; our original 'Rock' control panel and 'Account Manager,' an updated control panel designed for simplicity. While management options are generally the same across interfaces, the location of certain settings may vary between the two. Please see Account Manager vs. Bluerock to determine which step to follow.
Account Manager
- Log in to your Bluehost control panel.
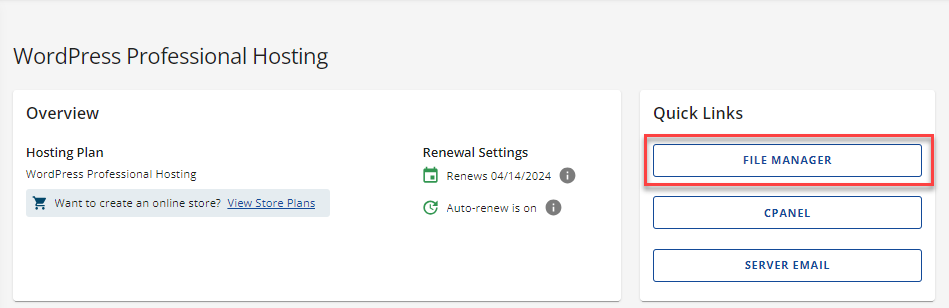
- Click the Hosting tab from the side navigation.
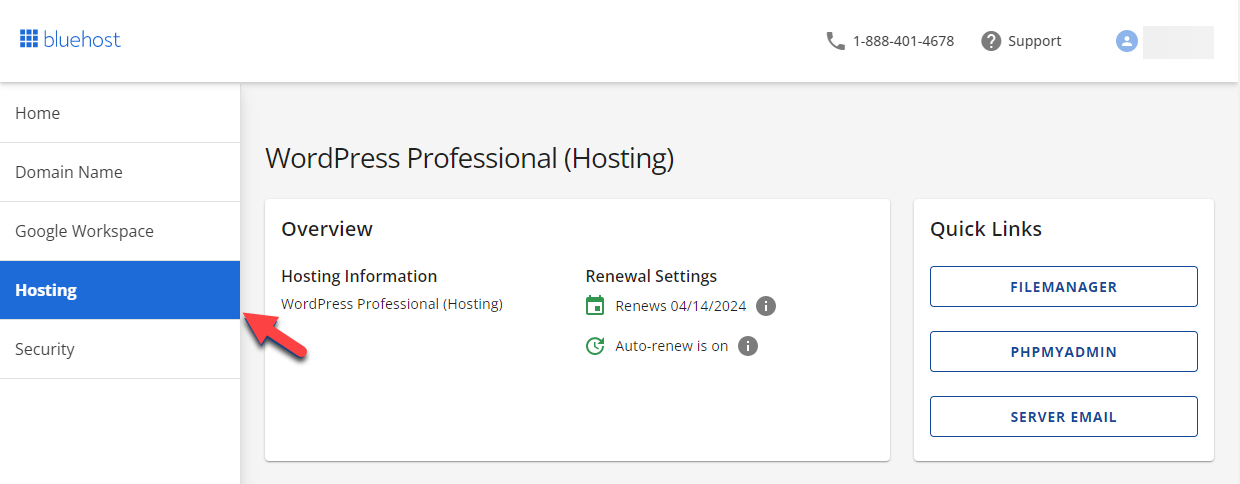
- Navigate to the Hosting tab and select the desired site. Locate the Quick Links tile. From there, click on File Manager to access the file management functionality.
Bluerock
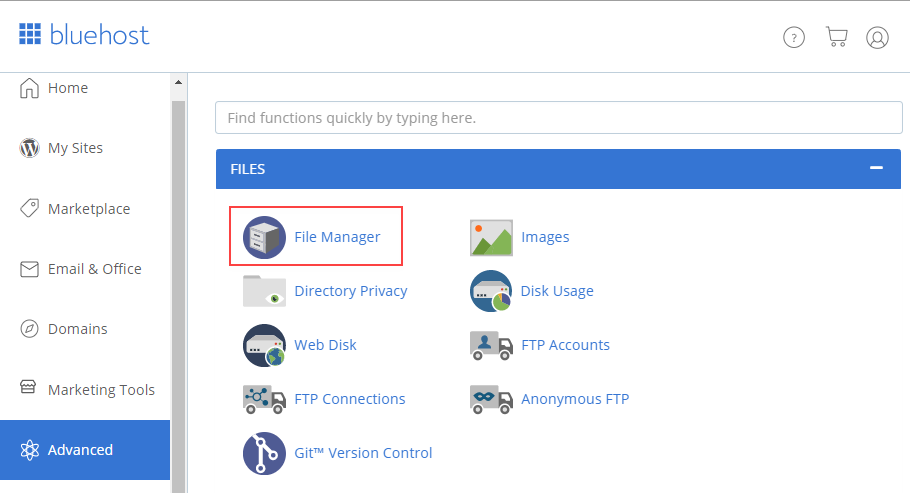
- Click on the Advanced tab from the side navigation menu to the left.
- Click File Manager from the submenu or under the Files section.
Copy The Files
Now that you are in the File Manager, you need to locate your files and copy them to the destination directory. The location of your files may vary, but your main site will be in the public_html directory. Other sites usually have their folders inside the public_html directory.
It is highly recommended that you copy the files rather than move them from the original location. Once the migration is complete and verified the site is working, you can remove the files in the old location. To complete the steps in this walkthrough, the files must be copied, not moved.
- In the File Manager, navigate to the directory containing your WordPress site.
- Click the Select All icon.
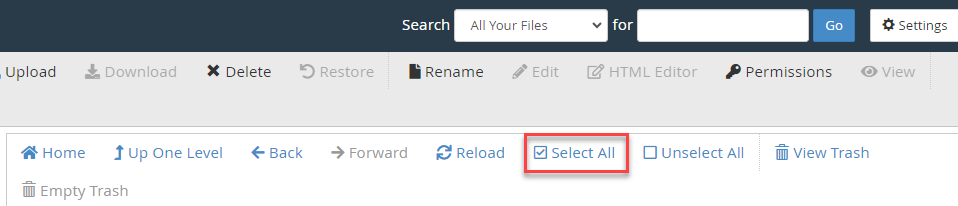
Note: If you have more than just WordPress files in your directory, you may want to deselect some files to avoid copying them.
- Once the files have been selected, click the Copy at the top of the screen.

- In the Copy popup, type the destination folder into the box next to the home icon.
- Click Copy File(s).
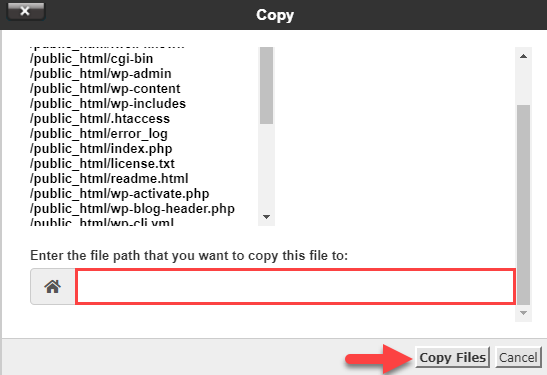
There isn't a progress bar to indicate if the copy was successful, so you'll need to go to the destination folder to confirm whether or not your files are there.
Update The URL (Optional)
Moving your website from one folder to another will change your URL unless you have adjusted the domain assignments to accommodate your account's change. If you want to know more about domain assignments, please, see Assigning an Addon or Parked Domain.
Important: Before changing the URL setting on your site, you must be certain the new URL is correct. Setting the wrong URL will break your WordPress site!
How do I find the correct URL?
Finding the correct URL isn't hard. A URL consists of a domain such as www.example.com. The domain is assigned to a folder in your account, like public_html. When someone types "www.example.com" into the browser, the website will load from the public_html folder. If there is a folder inside public_html containing a website, the URL would be "www.example.com/folder-name," where folder-name is the name of the specific folder inside public_html.
For example, the domain example.com is assigned to public_html. If you move the WordPress site from public_html to the public_html/blog folder, the WordPress site's new URL would be http://www.example.com/blog/.
Follow these steps to update your WordPress URL:
- Log in to your WordPress site using the old URL.
Note: Since the files were copied and not moved, your original site should still exist. You should not remove the original files until you have verified the site works in the new location.
- Hover over the Settings menu on the left side and click General.
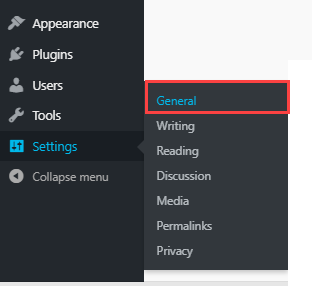
- Under General Settings, enter the new URL for both the WordPress Address URL and Site Address (URL).
- Click the Save Changes button once finished.
Once you click the Save Changes button, you will be redirected from WordPress to your website at the new location. Go ahead and test the site to make sure everything is working. If your images are no longer displaying properly, you may need to update more URLs in the database. The Velvet Blues plugin can help you update image URLs if necessary.
If you need further assistance, feel free to contact us via Chat or Phone:
- Chat Support - While on our website, you should see a CHAT bubble in the bottom right-hand corner of the page. Click anywhere on the bubble to begin a chat session.
- Phone Support -
- US: 888-401-4678
- International: +1 801-765-9400
You may also refer to our Knowledge Base articles to help answer common questions and guide you through various setup, configuration, and troubleshooting steps.