
Professional Email - How to Create a Mailbox Using a Domain Registered with Us
Bluehost's Account Manager has a new professional email service that allows you to manage your email service with us. In this article, we will guide you through the step-by-step process of creating a mailbox using your professional email plan.
Note: These instructions are for the Account Manager interface; if you need help determining your account's user interface, please check out our article, Account Manager vs. Bluerock, to learn more. If your domain is not registered with us, kindly visit our guide, How to Create a Mailbox Using External Domain Name.
- Log in to your Bluehost control panel.
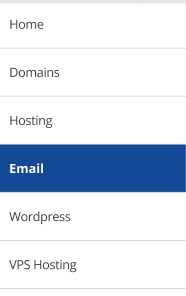
- On the left side of the page, select Email.
- Click Assign Mailbox.

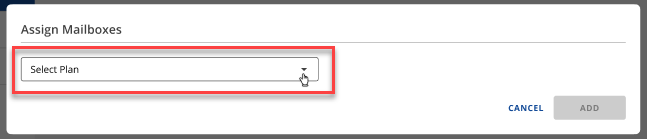
- The Assign Mailboxes will pop up, and click on the drop-down to select the plan you prefer.
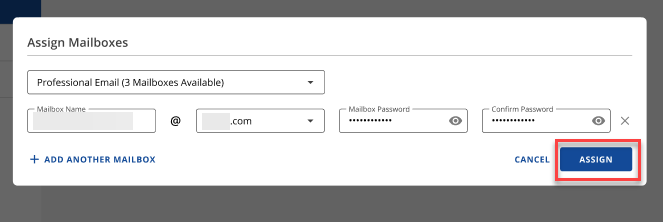
- Enter the necessary details such as Mailbox Name, Domain Name, Mailbox Password, and Confirm Password Field. Once you're done, click Assign.
- Once you're done, you'll see the confirmation pop-up showing it has been successfully added.

Note: Your changes might not take effect for up to 4 hours. For freshly registered domain names it could take up to 24-48 hours.
If you need further assistance, feel free to contact us via Chat or Phone:
- Chat Support - While on our website, you should see a CHAT bubble in the bottom right-hand corner of the page. Click anywhere on the bubble to begin a chat session.
- Phone Support -
- US: 888-401-4678
- International: +1 801-765-9400
You may also refer to our Knowledge Base articles to help answer common questions and guide you through various setup, configuration, and troubleshooting steps.