
Email Application Setup: Outlook 2010 for Windows
Overview
This guide will show step-by-step instructions to set up email on Outlook 2010 for Windows. While it can be used for other versions of Outlook, some screens and steps might vary.
Adding a new account
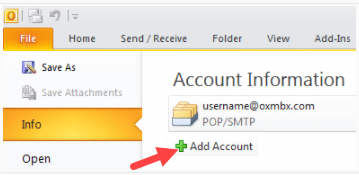
- Open the Microsoft Outlook 2010.
- Go to File > Info > Account information.
- Click the Add Account button.
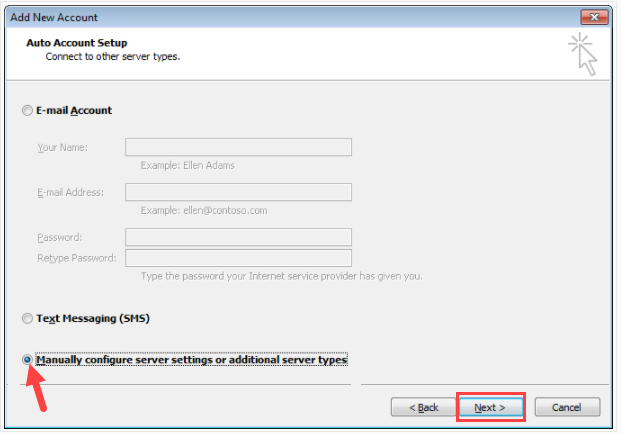
- Choose Manually configure server settings.
- Click the Next button.
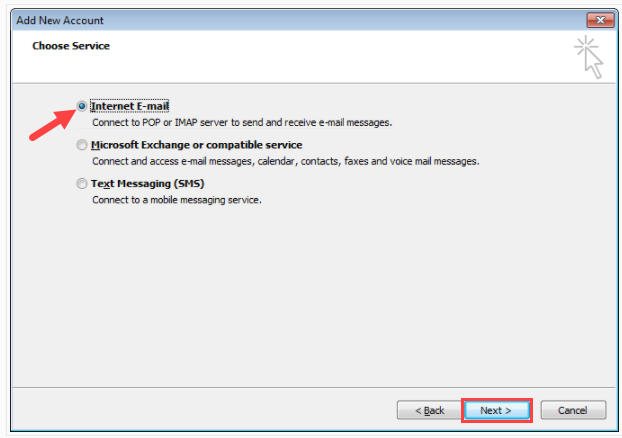
- Choose Internet E-Mail.
- Click the Next button.
Account Settings
Enter the details in each field on the screen:
- Your Name: Enter your name as you want it to appear on your outbound email messages.
- E-mail Address: Your email address.
- Account Type: IMAP or POP3. We recommend IMAP.
- Incoming Mail Server: mail.example.com, replacing example.com with your domain name.
- Outgoing Mail Server: mail.example.com, replacing example.com with your domain name.
- User Name: Your email address.
- Password: Your email account password.
More Settings
- Click More Settings.
- Go to the Outgoing Server tab.
- Check the My outgoing server (SMTP) requires authentication checkbox.
- Ensure you're using the same settings as your incoming mail server.
- Go to the Advanced tab.
- For IMAP with SSL*, change the following settings:
- Incoming Port: 993
- Outgoing Port: 465
- SSL: SSL/TLS
- Authentication: Normal password
- Click the OK button.
- Click the Next button.
Pro Tip: For other configuration settings, check Email Device Setup in your Email Manager, or refer to our Email Application Setup article.
Testing Settings
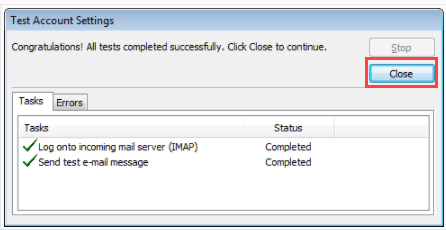
- While on the E-mail Accounts screen, click Test Account Settings. This will check your settings and send a test email to yourself to confirm that everything is working. If you receive any errors, please check your configuration.
- Click the Close button on the Test Account Settings window.
- Click Next on the E-mail Accounts window.
- Click Finish.
You're done! Outlook 2010 is now correctly configured to send and receive emails.
If you need further assistance, feel free to contact us via Chat or Phone:
- Chat Support - While on our website, you should see a CHAT bubble in the bottom right-hand corner of the page. Click anywhere on the bubble to begin a chat session.
- Phone Support -
- US: 888-401-4678
- International: +1 801-765-9400
You may also refer to our Knowledge Base articles to help answer common questions and guide you through various setup, configuration, and troubleshooting steps.