
Changing WordPress Themes from the Database
Sometimes, updates made to WordPress or Plugins may break your site due to incompatibilities with your Theme. In most cases, this will prevent you from being able to access the Admin Dashboard, and the Theme will need to be updated to fix any errors. This guide will walk you through updating your WordPress Theme from the Database if you cannot access the Admin Dashboard.
- Accessing phpMyAdmin
- Setting a New Theme
- How to change the name of your WordPress site without WP Tools
Accessing phpMyAdmin
Note: Bluehost provides two interface choices for account management: the original Bluerock control panel and the newer 'Account Manager' designed for easier use. Although both offer similar management features, the settings and locations might differ. Refer to 'Account Manager vs. Bluerock' to understand which guidelines to follow.
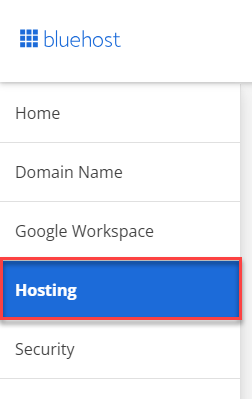
Account Manager
- Log in to your Bluehost control panel.
- Click the Hosting tab from the side navigation.
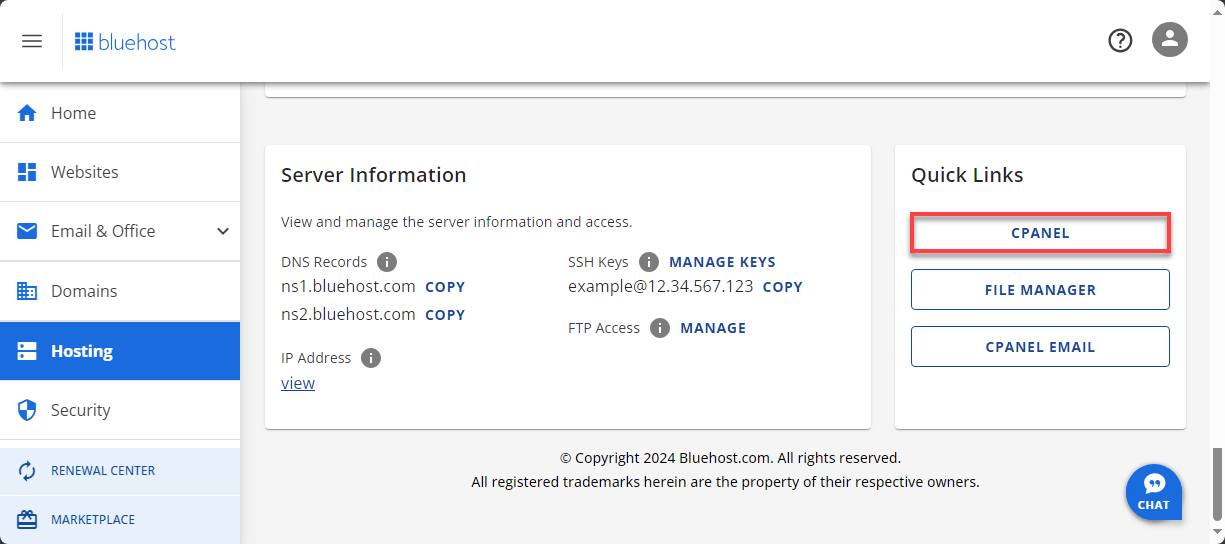
- Under Quick Links, click on cPanel.
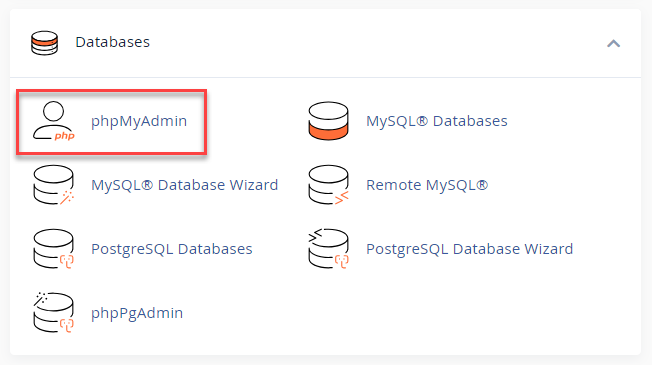
- In cPanel, scroll down and locate the Databases section, then click on phpMyAdmin.
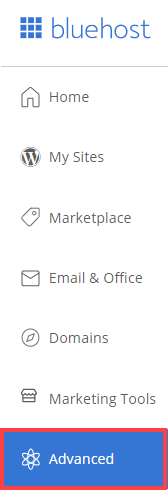
Bluerock
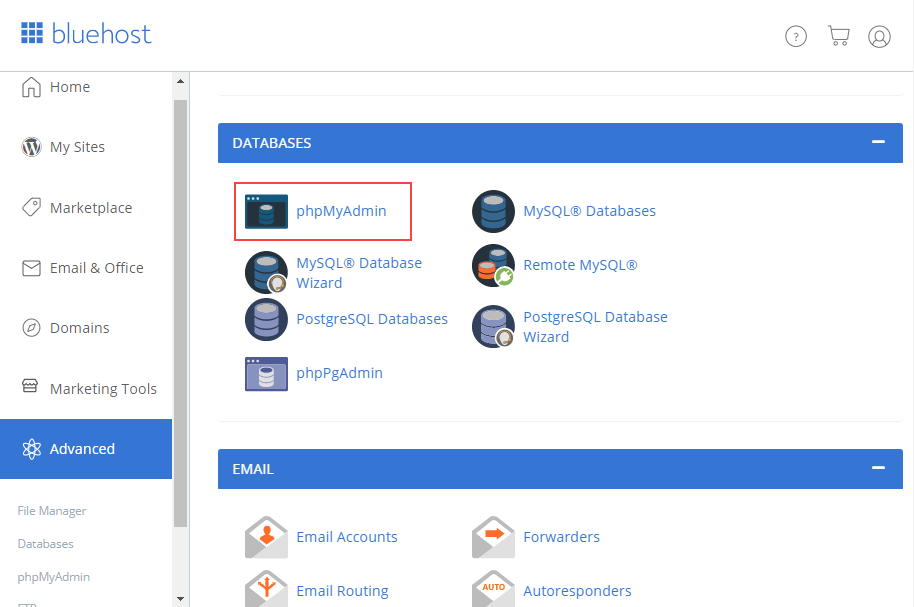
- Click the Advanced tab from the side navigation bar to the left.
- Click on the phpMyAdmin icon in the Databases section.
Once you have opened phpMyAdmin, choose the database the WordPress site in question is using. Click the + icon next to your username to expand if you do not see a list of databases in the sidebar on the left.
Setting a New Theme
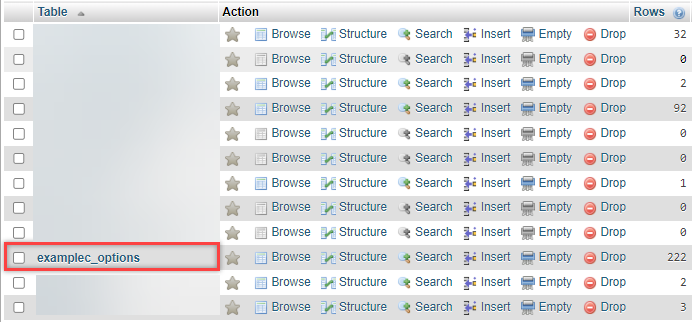
- Select the wp_options table. For instance, we have 'example_options'
- Once loaded, click on the Browse tab. This allows you to browse the columns broken down into pages.
- Check the box to Show All.
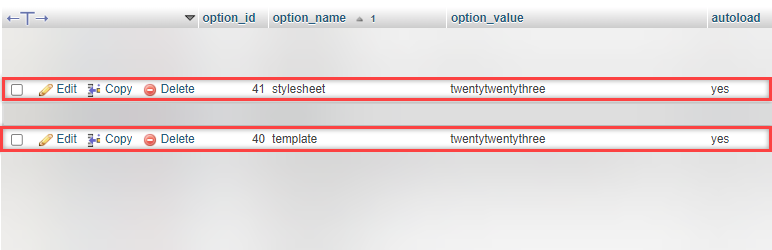
- Locate the template and stylesheet settings. Click Edit.
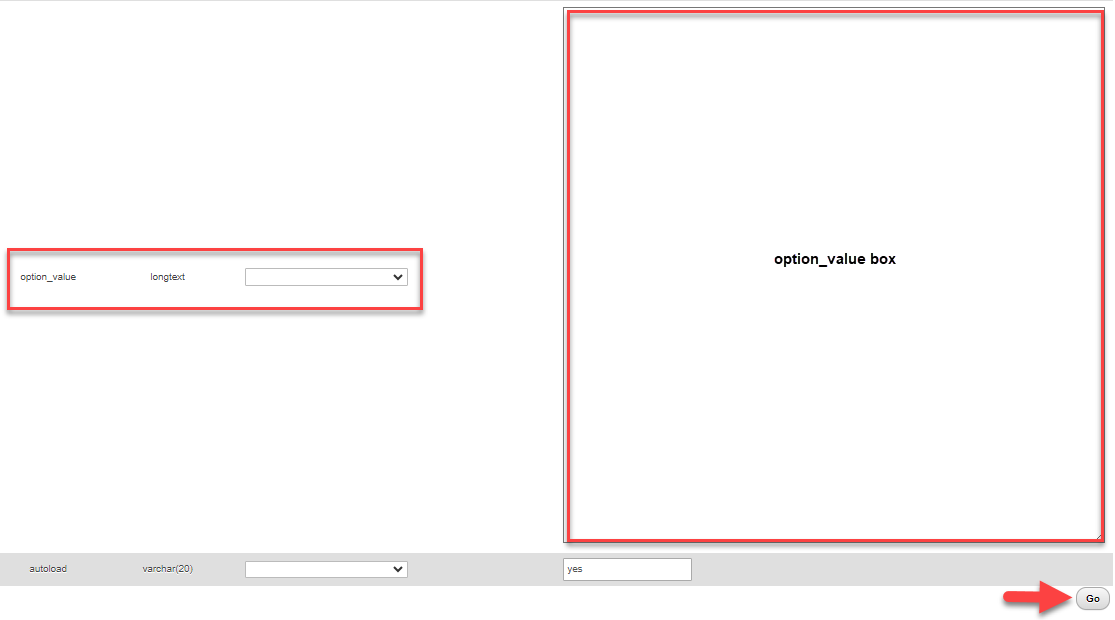
- In the option_value setting, replace the current theme with a default theme (Twentyfifteen, Twentysixteen, etc.).
- Click Go to save when you are finished.
Once updated, your WordPress site and Admin Dashboard should be accessible.
How to change the name of your WordPress site without WP Tools
There may come a time when you need to duplicate the content of your WordPress site and use it on a different domain name. Perhaps you are promoting a product that is known by more than one name, and you would like to have separate domains for each product name.
Instead of designing a new site for every domain, you may choose to use the content that already exists on one of your current domains. The following article will guide you through duplicating a WordPress site.
Note: Please be aware that following the steps below may not be enough to successfully change your domain due to the way WordPress communicates with the server. It is recommended that you make a full backup of your website using the Backups button in cPanel before proceeding with the remaining steps in this article.
Let us do the work for you! If you would like to have our experienced administrators accomplish this task for you, please contact us via phone (888) 401-4678) or Live Chat to request a price quote.
Step 1: Copy Files to the New Domain
To add a new domain, go to cPanel > Addon Domains; then complete the following steps to copy files to your new domain.
- Under the Domains Section, select Domains.

- Click Create a New Domain.

Once you have finished adding your new domain name, proceed to the following steps:
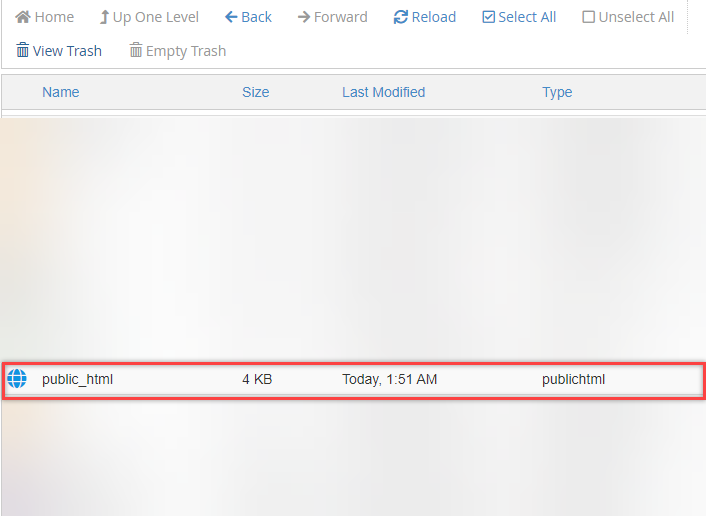
- From the cPanel homepage, under the Files section, open File Manager.

- Open the public_html folder.
- Along the top of the screen, click Select all.
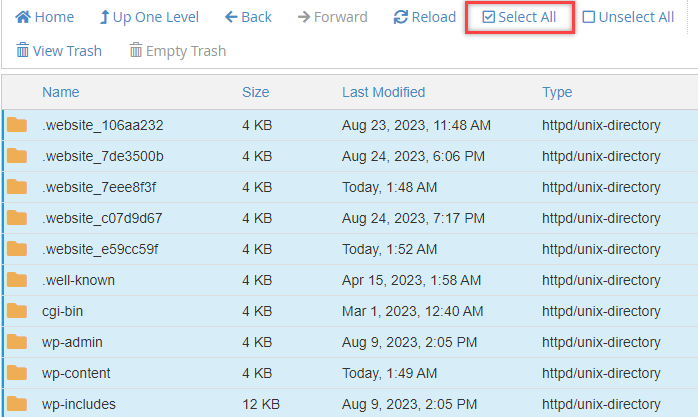
- Press and hold the Ctrl key while clicking (un-selecting) the following folders in your public_html folder:
- .qidb
- cgi-bin
- addon domain folder
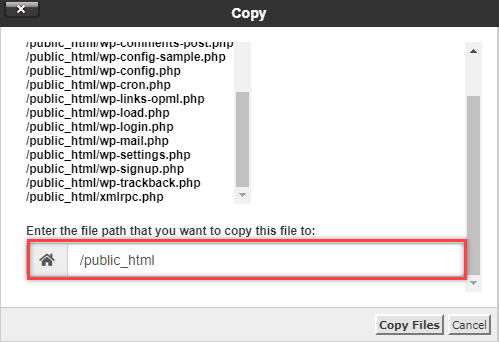
- With the files still highlighted, click Copy in the top menu of the File Manager. A pop-up will open showing the following path: /public_html
- Type the name of the addon domain folder to which you are copying the files. This box should now look similar to: /public_html/addondomainname.com
- Click Copy File(s).
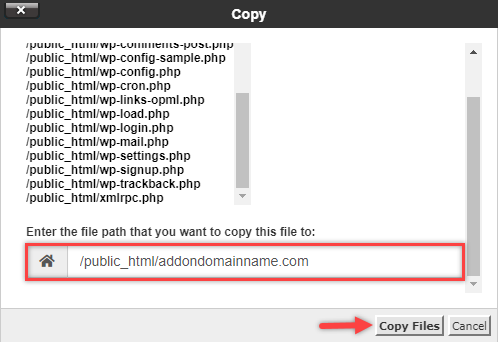
Note: Replace addondomainname.com with the actual domain.
Step 2: Create a New MySQL Database
Once the files have been copied over to your addon domain folder, in another screen, open the MySQL Database Wizard in cPanel. This is where you will need to create a new MySQL database.
Step 3: Edit the WordPress .config File for your New Site
To edit the wp-config.php file for WordPress:
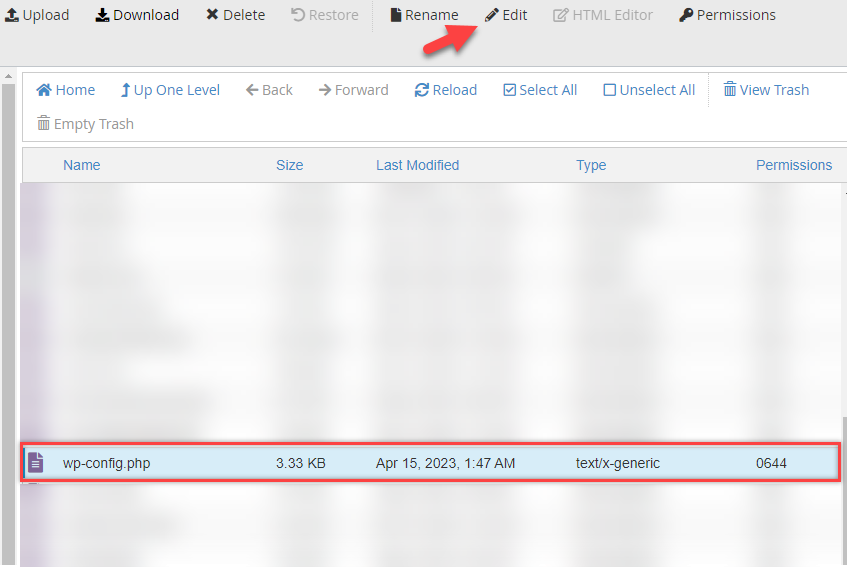
- In cPanel, go to File Manager.
- Open the public_html folder and locate your addon domain folder.
- Right-click on the wp-config.php file and click Code Edit. Another option is to click on the Edit icon on the toolbar after selecting the wp-config.php file.
- When this page opens, edit the following information to reflect the values that were assigned to the new database that was created in the previous step.
- DB_NAME
- DB_USER
- DB_PASSWORD
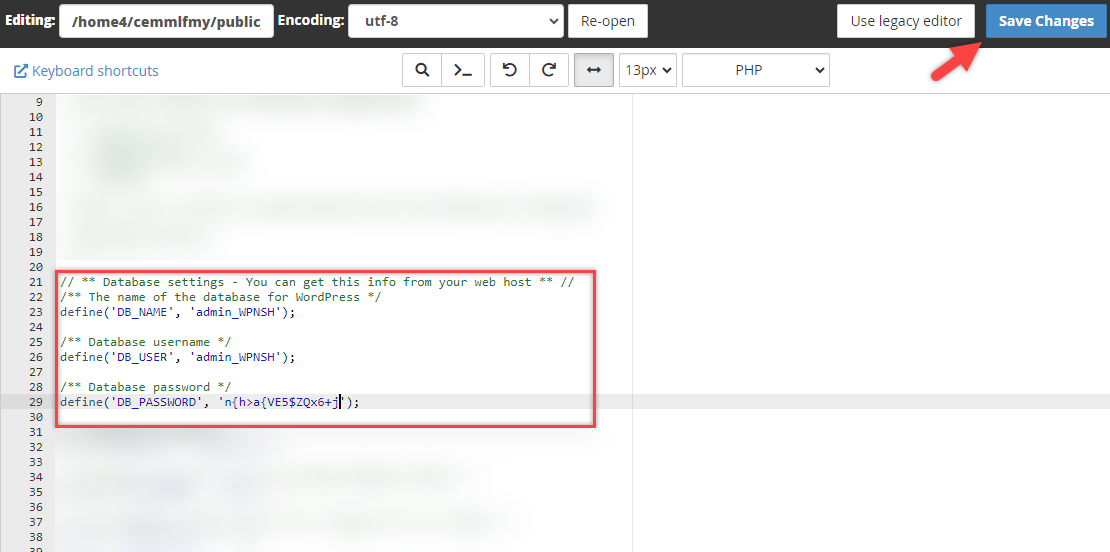
- Click Save Changes.
Your wp-config.php file should now reflect the correct database name, database user, and database password. This is essential for WordPress to know which database to obtain the information from.
Step 4: Export the Database
Export the database from the primary domain and import it into the newly created database. For help with this process, please refer to the following articles:
Step 5: Update the Database
The database settings must be updated to reflect the new domain name information.
- Go into cPanel, and under Databases, click on the phpMyAdmin icon.
- In the left navigation panel, click on the newly created database name. For example, we have here NewDataBase_WPFZF.
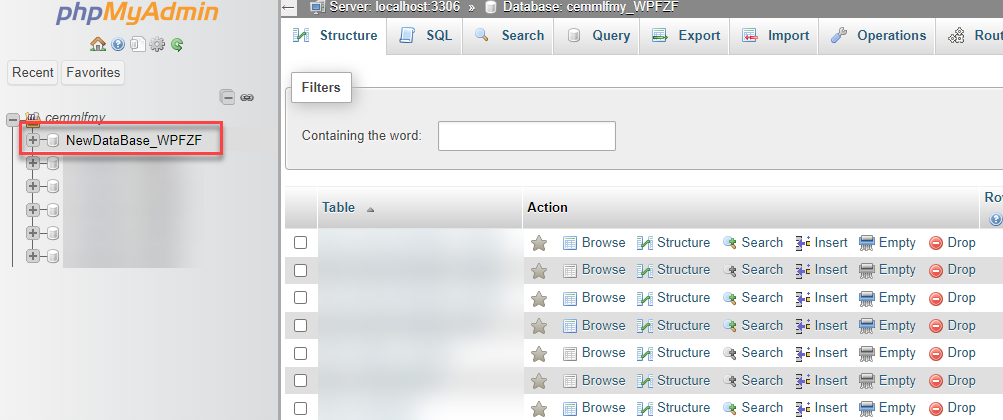
- In the left navigation panel, click the table that says "_options". As an example, we have here 'examplec_options'.
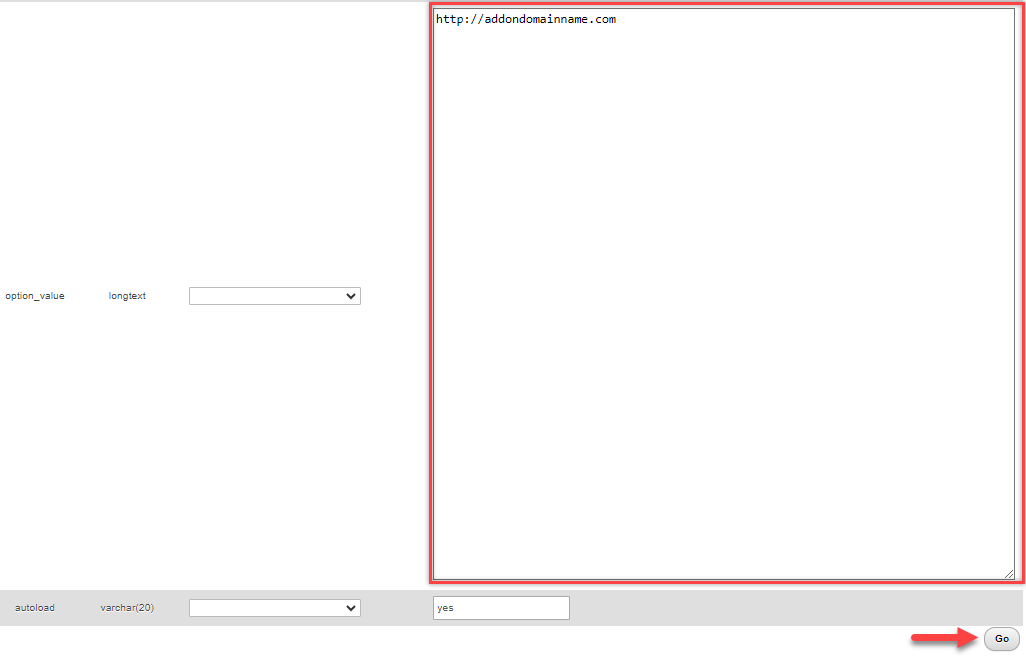
- Click Edit on the siteurl line.
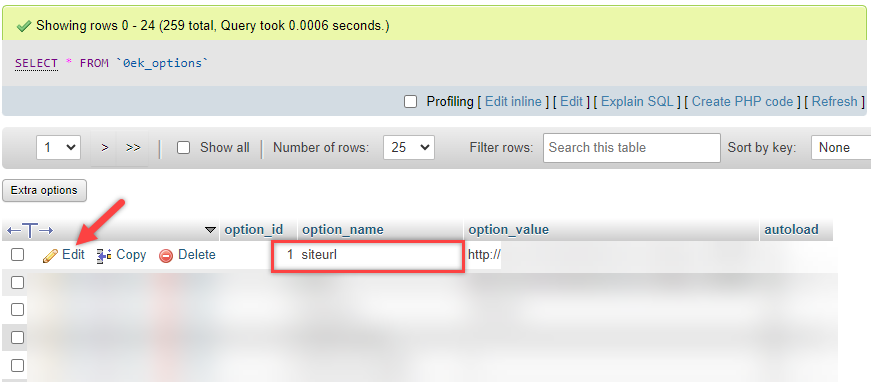
- Change the primary domain name to the addon domain name. Then click Go.
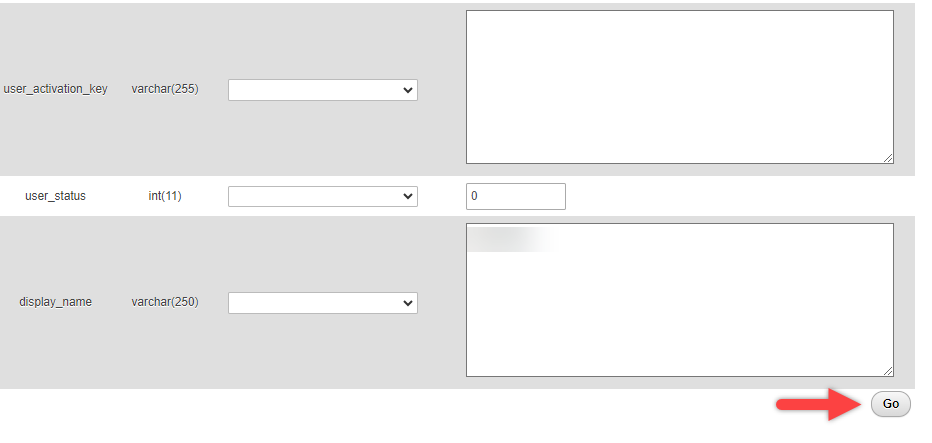
- Once you're done. Click Edit on the blogname line.
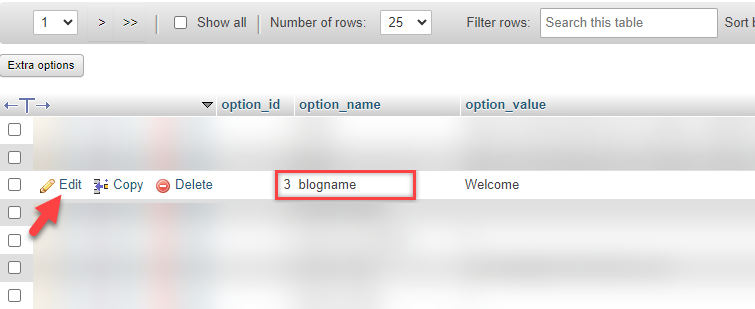
- Change the blog name to reflect your new blog, and click Go.

- Click Edit on the blog description line.
- Change the blog description to reflect your new blog, and click Go.
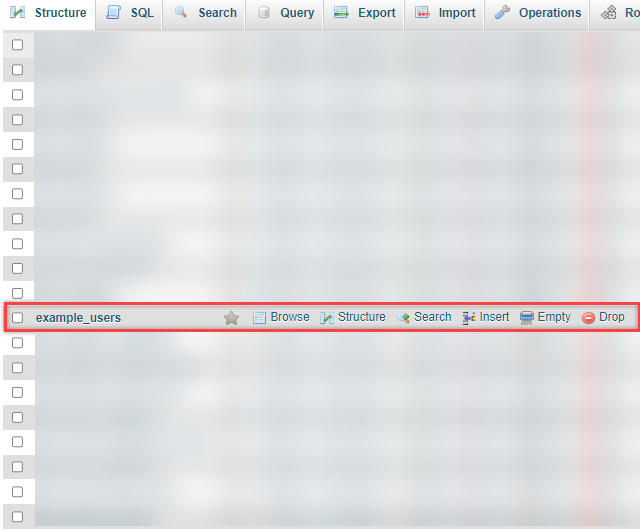
- In the left navigation panel, click the table that says _users. For example, we have here saying 'example_users'.
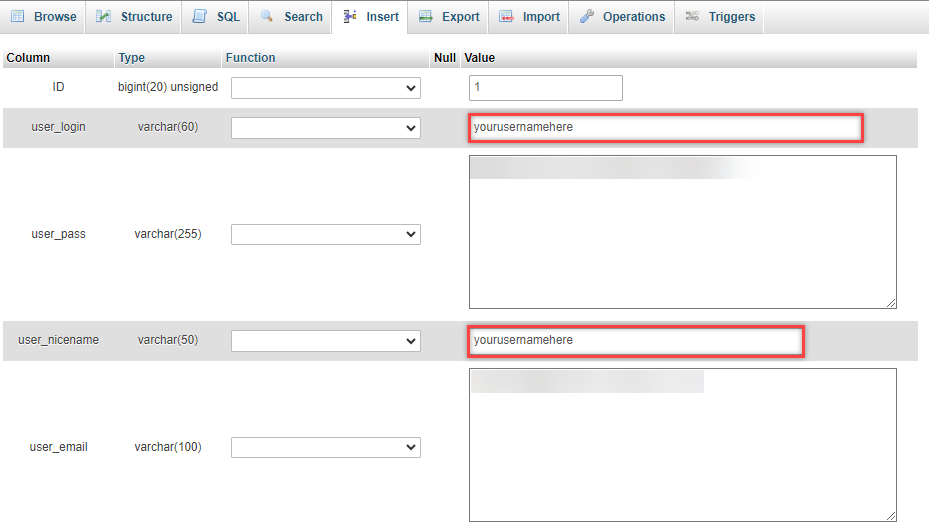
- Click Edit on the user_login line and change the user name to reflect a new login username of your choice.

- On the user_nicename line, change it there as well. For security purposes, do not use Admin as either username.
- On the user_pass line, highlight and delete the characters already in that box. Create a new password of your choice.
- To the left of that is the varchar(64) box; click the down arrow and select MD5.
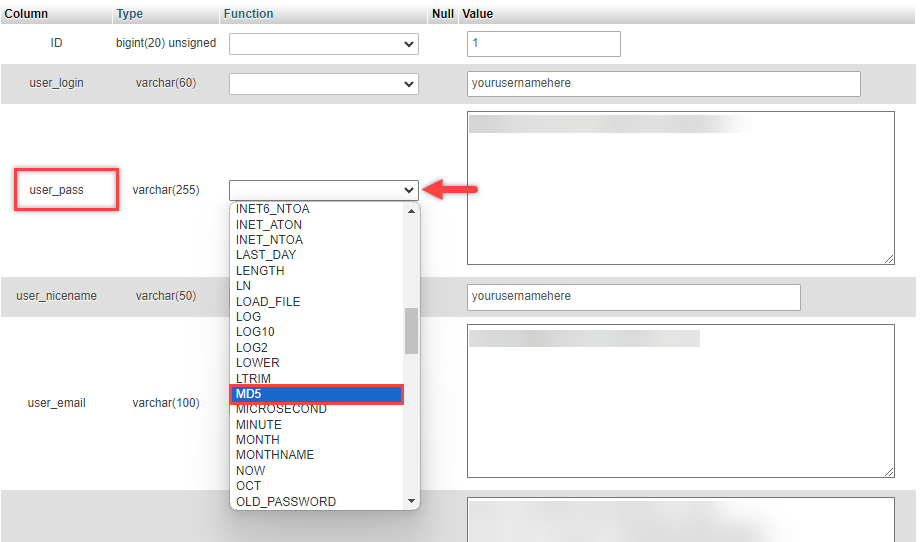
- Click Go.
You can test these changes by visiting http://yourblogname.com/wp-login.php (replace yourblogname.com with your actual domain name).
You should now be able to log in to your newly imported WordPress site.
Step 6: Update the Database Tables
Once the domain is working, and you can log in to the WordPress Dashboard of the new site, install the Search and Replace plugin. It will allow you to search all of the tables in the database, search for your old domain and replace each instance with your new domain. You can uninstall the plugin after the tables have been updated. In addition to the database, you should check your site for any links hard-coded into widgets, etc. Those links will need to be manually edited to reference your new site address.
Step 7: Update WordPress
- Log in to your WordPress Dashboard.
- In the left navigation menu, go to Settings.
- Click General.

- Be sure that each of the following fields displays your new domain name and not the old one:
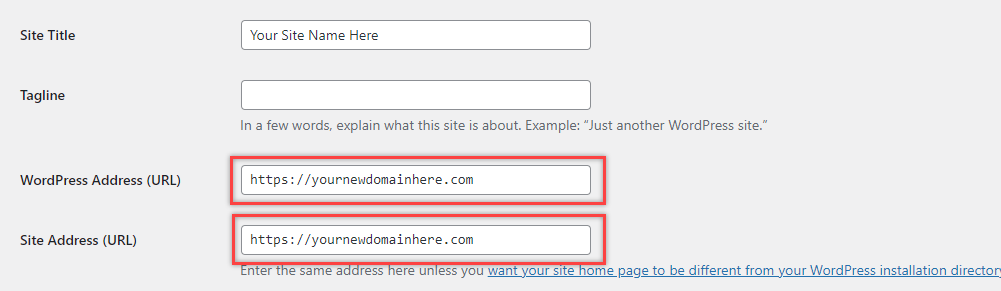
- WordPress Address (URL)
- Site Address (URL)
- Click Save Changes.
If you need further assistance, feel free to contact us via Chat or Phone:
- Chat Support - While on our website, you should see a CHAT bubble in the bottom right-hand corner of the page. Click anywhere on the bubble to begin a chat session.
- Phone Support -
- US: 888-401-4678
- International: +1 801-765-9400
You may also refer to our Knowledge Base articles to help answer common questions and guide you through various setup, configuration, and troubleshooting steps.